
. Advertisement .
..3..
. Advertisement .
..4..
Confirmation boxes are a great tool for those of us who need to collect information from a user. This article will teach you how to make an easy-to-use Confirmation Box: Yes/No options In JavaScript. You’ll need to make one small change in your code, so before you get started make sure you have a basic understanding of JavaScript.
What is Confirmation Box with Yes/No options?
The confirm option is usually used when you want to ask users to confirm or accept the validity of something. It could also be a JavaScript alert box that has a yes-no option. In the event that the person clicks “OK” ( “Yes” ) is true, otherwise clicking “Cancel” ( “No” ) results in false.
How To Create Confirmation Box: Yes/No options In JavaScript?
If you use Javascript, an easy way to create a confirmation box with a yes/no option is to use the Confirm() function.
Function: This Confirm() function can also show a pop-up however, it offers two other options, Yes and No. If the user chooses Yes it returns TRUE, and in the opposite case, if one opts to return NO, it will return False. There is also one parameter that is passed, and this parameter specifies the content of the message.
Syntax: Confirm() method is used with the following syntax:
confirm("Content to notify");For example:
let isExecuted = confirm("Are you sure to execute this action?");

console.log(isExecuted); // OK = true, Cancel = false
Note: The confirm() method is one of the window object components, meaning that it can only be called via the browser.
After installing the box, you can test it by opening the console, selecting console and entering the syntax of the function like below:
......... ADVERTISEMENT .........
..8..
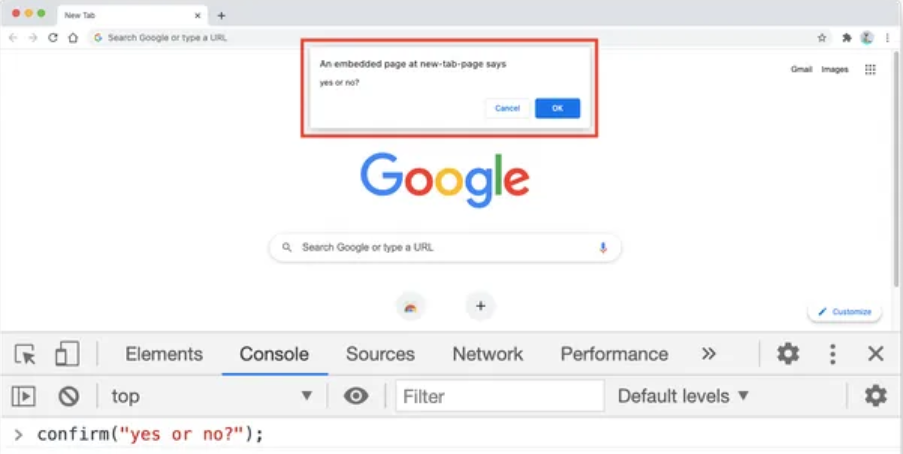
To easily visualize how the box works, follow the code below:
<!DOCTYPE html>
<html lang="en">
<head>
<meta charset="utf-8" />
<title>JavaScript confirmation box</title>
<script>
// The function below will start the confirmation dialog
function confirmAction() {
let confirmAction = confirm("Are you sure to execute this action?");
if (confirmAction) {
alert("Action successfully executed");
} else {
alert("Action canceled");
}
}
</script>
</head>
<body>
<h1>Call the confirmation box</h1>
<button onclick="confirmAction()">Delete</button>
</body>
</html>
Explain: when the user selects the delete button, the HTML page code will initiate a confirmation dialog.
Once you have created the box, then you need to create the command when the user has selected yes or no by using if/else code block:
if (confirmAction) {
// if true
alert("Action successfully executed");
} else {
// if false
alert("Action canceled");
}
So you have completed the steps to create the confirmation box.
Conclusion
Confirmation boxes can be extremely helpful when it comes to user interaction. By providing users with a way to confirm or deny a request, you are reducing the chances of them making an accidental change that might affect the data they are working with. Through the article “How To Create Confirmation Box: Yes/No options In JavaScript”, hope it will help you to create box successfully. Thanks for reading!
Leave a comment